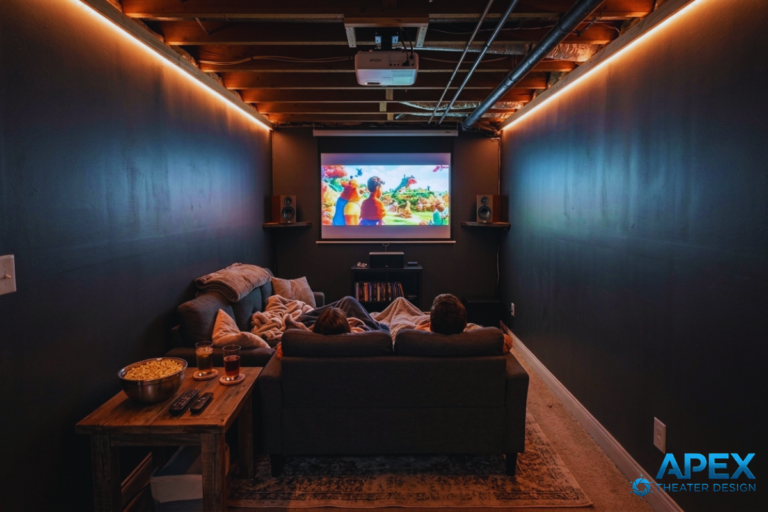
Designing a basement home theater is thrilling, but as an absolute beginner, you’re most likely to overlook the seating part. I’ve built, upgraded, and recalibrated dozens of basement theaters over the years, and seating always ends up being the single biggest factor in both comfort and performance.
The right seats, placement, and spacing can make your system feel cinematic, while the wrong choices leave you squinting at the screen or chasing bass nulls.
This guide walks you step by step through basement home theater seating ideas, backed by real-world experience. You’ll get practical layouts, material tips, acoustic insights, and troubleshooting advice to help you achieve the best seating for your basement movie room.
First Things First: Measure Your Basement Space
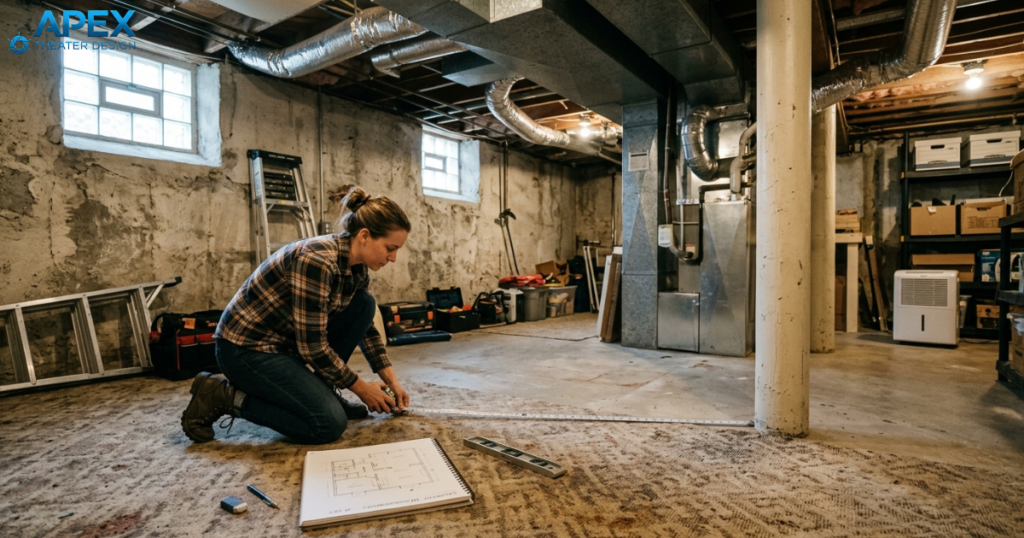
BEFORE you can even buy any seats for your movie room, I highly advise you to start by measuring everything. Why? Because basement ceilings are often low, walls are uneven, and support columns can be in awkward places.
For example, in one theater I built, a 7-foot ceiling forced me to swap tall recliners for low-profile theater chairs. Without that adjustment, guests complained of neck strain during long movie sessions.
Doorways and staircases matter too… A 3-seat cinema row might look fine on paper, but won’t fit through a narrow basement doorway. I often use modular sectionals or chairs with removable arms to solve this problem. These types of seats allow flexibility without expensive custom builds.
Pro Tip: I advise you to sketch your basement to scale, marking columns, HVAC ducts, and power outlets. Believe you me, this makes choosing seats and layout 10x easier!
Step 1: Prioritize The Viewing Distance and Sightlines
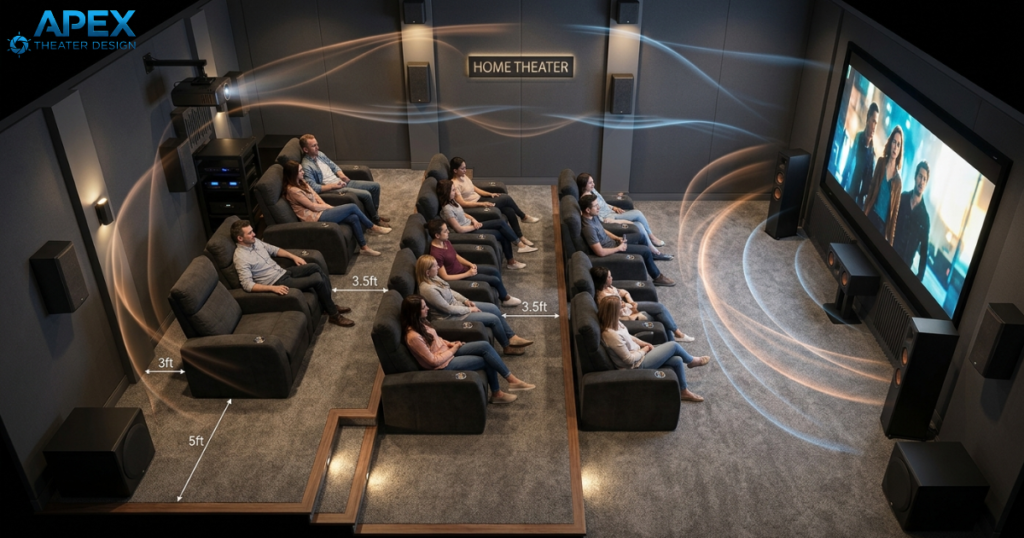
Most homeowners turning basements into movie theaters for the first time tend to cram the room with as many seats as possible. That’s a HUGE mistake! Your main row should sit 1.5–2.5 times the screen height away. For a 100-inch screen, that’s roughly 12–20 feet. Moving a row even a foot forward or backward can dramatically improve clarity and reduce eye strain.
For multiple rows, staggered seating is more ideal. I recommend using a riser 6–8 inches high for the second row. In my early days of career as a home theater installer, I did one basement project where I initially skipped the riser. The result? The second row could barely see the bottom third of the screen. Adding a simple plywood riser corrected the sightline instantly.
Pro Tip: Remember to keep the walkways at least 2 feet wide between rows. Crowded spaces make people feel boxed in and complicate emergency access.
Step 2: Choosing The Right Basement Theater Seating
Not all seating works equally well in basements. Here’s what I’ve learned about different seating types from repeated trial and error:
Recliners
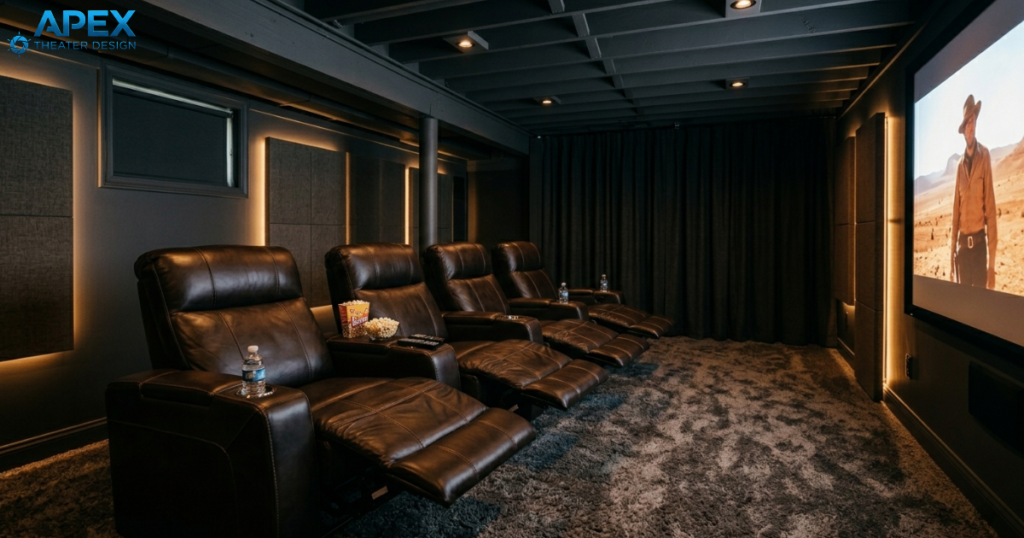
Recliners are the classic home theater choice. Given a choice, most homeowners would go for leather and faux leather recliners. While these are durable and easy to clean, they tend to reflect sound differently. And this makes dialogue or midrange feel slightly bright if too close to the speakers.
Fabric recliners, on the other hand, absorb reflections better and feel warmer in cold basements.
Compact or armless recliners are the best choice for narrow rooms.
When you choose to install recliners, always ensure there’s enough clearance behind each seat to fully recline without bumping walls or subwoofers.
Personally, I’ve moved subwoofers multiple times just to avoid bass nulls caused by seats being too close to corners.
Sectionals
Sectionals are excellent for multipurpose basements. Their modular designs allow for easy rearrangement for parties or gaming nights.
But you should always watch the depth: deep couches push viewers too far from the screen. Adding a narrow ottoman or a loveseat in front of a sectional seat can help you balance the distance without overcrowding.
In one layout, I placed a deep sectional along the back wall. The bass sounded uneven until I shifted it 14 inches forward, freeing up low-frequency energy and improving clarity.
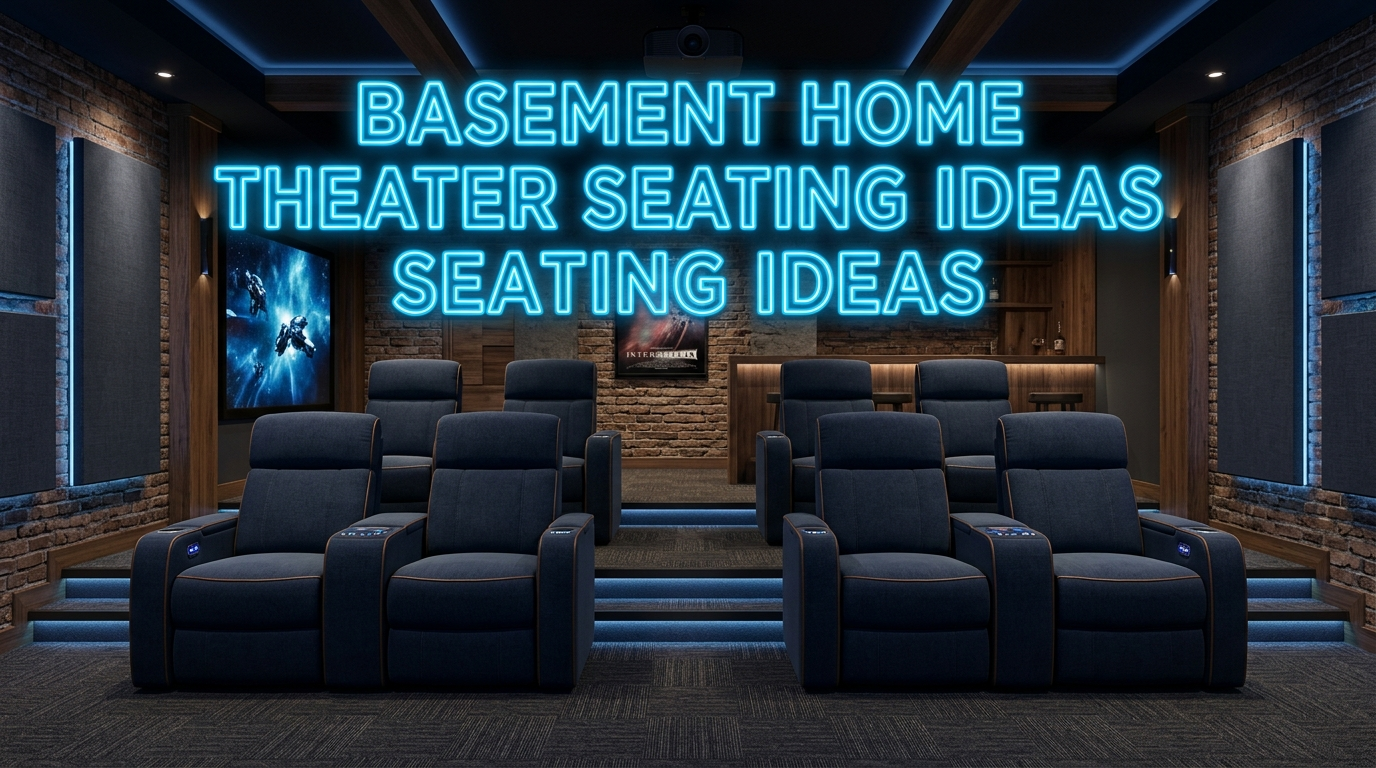
Cinema-Style Rows
This is the perfect basement home theater seating idea if you plan to host friends. Chairs with cupholders and consistent arm spacing are a favorite for me. Legroom is crucial, too.
In one installation, a second row was too close, causing knees to bump the first row when reclining. Simply moving it back solved the problem immediately.
So, the lesson here is to always plan for recline clearance. Standard cinema chairs extend about 3 feet when fully reclined. Measure carefully before installation.
Other Basement Home Theater Seating Ideas:
- Futons or sleeper sofas: Good for dual-purpose spaces but often too soft for long movie sessions.
- Bench seating: Budget-friendly and compact, but can cause discomfort and uneven viewing angles over time.
- Bean bag chairs: Bean bag chairs in the movie room offer you a casual, flexible seating option, especially for kids or informal setups. They’re lightweight, easy to move, and don’t require risers. But keep in mind they sit low to the movie room floor, so you may need to adjust sightlines to the screen. Also, they can be less supportive for extended viewing sessions than recliners or sofas.
Pro Tip: If you decide to use low bean bag seating, you should consider placing them on a small riser or adding a firm cushion underneath. This raises viewers slightly, improving sightlines to the screen and making long movie sessions more comfortable without taking up extra floor space.
Step 3: Seating Materials and Comfort

When you’re picking seats for your home movie room, the materials they’re made from matter more than most beginners realize. The material not only affects how comfortable you’ll be during long movie nights but also influences the sound in your room.
- Leather: Sleek, easy to clean, reflective. Ideal for high-use rooms, but may make sound feel slightly brighter near listening positions.
- Fabric: Absorbs sound, comfortable for long sessions, warm in basements.
- Mixed: Leather fronts with fabric sides balance durability, comfort, and sound absorption.
I’ve found that small touches like fabric throws on leather headrests can help absorb early reflections without changing aesthetics. Even beginner setups benefit from subtle acoustic thinking.
Step 4: How Seating Placement Impacts Acoustics
Seating usually affects room acoustics more than you realize. Good placement ensures each seat receives direct sound energy and proper reflections, as discussed in anacoustics design paper on audience sightlines and direct sound importance. (Source).
Upholstered furniture absorbs mid and high frequencies, reducing harsh reflections. But placing a couch flush against the back wall can cause bass nulls, leaving certain seats “boomy” or weak.
I usually leave 12–18 inches between the back row and the wall to allow low-frequency energy to circulate. This small adjustment can dramatically improve bass performance without adding subwoofers.
Tip: Avoid placing tall furniture directly in front of speakers. It can interfere with sound dispersion and cause muddy audio in key listening spots.
Step 5: Lighting Considerations for Basement Seating
Good lighting makes a basement home theater safer and more comfortable. It helps people move around without tripping, reach snacks easily, and still enjoy the movie clearly.
This is what I usually install in basement movie theaters:
- LED strips along risers: They give a soft glow that marks steps and pathways while keeping the screen bright and clear.
- Small, dimmable side lamps: These are also useful when placed near armrests. They provide just enough light for reading or grabbing a drink without being distracting.
- Avoid floor lamps behind rows: These often cause problems as they can easily reflect off the screen and ruin contrast.
In one theater I set up, I placed two floor lamps behind the last row, and guests kept noticing glare on the screen. Moving the lamps to the sides fixed the issue quickly and completely.
Step 6: Budget-Friendly Basement Theater Seating Ideas
You don’t have to spend thousands to create a great basement theater. Many of the most comfortable and functional setups come from smart choices rather than high-end spending.
Here are some budget-friendly seating ideas to consider for your basement movie room:
- Gently used theater chairs or sectionals can be an excellent starting point. Enthusiasts often upgrade their setups and sell perfectly functional furniture at a fraction of the original cost.
- DIY risers are another way to save money without sacrificing comfort or sightlines.
- Using plywood and carpet padding, you can build a sturdy platform for a second row that elevates the back seats and improves viewing angles.
- Small touches like throw pillows or blankets not only make seating more comfortable but also help absorb early reflections, subtly improving the sound in the room.
- Modular seating is worth considering, too. Pieces that can be rearranged or moved allow your theater to adapt to parties, family game nights, or future upgrades without replacing the entire setup.
In one project, we converted a 12×18 basement into a full theater using two used recliners for the main row and a sectional in the back. The total cost stayed under $1,500.
The result felt comfortable and immersive, and guests couldn’t tell it wasn’t a high-end installation. Thoughtful planning and small adjustments often matter more than expensive furniture.
Step 7: Common Basement Seating Mistakes and How to Avoid Them
Even small missteps in seating placement can have a big impact on comfort and sound. Here are the most common mistakes homeowners keep making with movie room seating:
- Crowding the room: Adding too many chairs may seem like a good idea on paper, but it reduces legroom, makes walkways tight, and can interfere with how sound travels.
- Skipping risers: Without elevation, back rows often have blocked sightlines, leaving guests craning their necks to see the screen.
- Ignoring projector clearance: Bulky chairs or tall furniture can partially block the projector beam, creating shadows or cutting off parts of the image.
- Placing seating against walls: While this may save space, it often creates bass nulls or boomy spots, making some seats sound weak or uneven.
- Neglecting lighting and pathways: Dim or poorly placed lights can cause tripping hazards, while glare from lamps can ruin the cinematic experience.
I’ve fixed all these issues in real installations, and I’ve learned that small changes can make a huge difference. Moving a couch a few inches, adding a simple riser, or repositioning a subwoofer often transforms both comfort and sound.
Step 8: Step-by-Step Layout Process for Beginners
Planning your basement theater layout can feel overwhelming at first, but a clear process makes it manageable.
Over the years, I’ve developed a method that helps beginners map out seating, screen placement, and speaker positions while avoiding common mistakes.
Here’s the approach I use:
- Measure the room: Ceiling, walls, doors, and columns.
- Sketch a to-scale diagram: Mark projector position, screen, and speakers.
- Mark seating footprints: Include recline space and walkways.
- Place the main row first: Optimal distance from the screen is the priority.
- Add secondary rows: Stagger or riser as needed.
- Check sightlines: Walk through each row; everyone should see the center of the screen comfortably.
- Verify acoustic space: Leave at least 12 inches behind the main row.
- Adjust lighting and accessibility: Add LED strips or dimmable lamps.
Following this process saves you trial-and-error headaches.
Step 9: Future-Proofing Your Basement Theater
Even if this is your first movie room, thinking ahead can save you a lot of time and money. Planning for future upgrades (like bigger screens, additional rows, or new speakers) ensures your basement setup can evolve without major renovations.
Here’s what I focus on when designing a theater with growth in mind:
- Leave space for additional rows or a larger screen.
- Make wiring and power accessible.
- Choose modular seating that can adapt.
- Consider future projector or speaker upgrades and ensure clearance.
In one theater, the original seating plan didn’t account for a future 120-inch screen. And guess what? We had to rebuild the riser to accommodate it. Just a small foresight now can save you thousands later.
Step 10: Maintenance And Longevity
Your seating will last longer and stay comfortable if you give it a little regular care.:
- Leather: Clean with a damp cloth; use conditioner occasionally.
- Fabric: Vacuum regularly; spot clean as needed.
- Cushions: Rotate or fluff periodically to maintain shape.
Even high-end seating can sag or compress over time if neglected. Proper care keeps your basement theater feeling fresh for years.
Bonus Tips from Real Installations
Over the years, I’ve noticed a few small tricks that make a big difference in basement theaters…
- Test before final placement: Move chairs a few inches forward or back and notice how sound and sightlines change.
- Don’t overstuff the room: Comfort and acoustics always outweigh the number of seats.
- Listen with everyone seated: Bass perception changes with the number of people in the room.
- Combine seating types: A recliner main row with a sectional back row often works best for families.
- Think about secondary uses: Sectionals and modular chairs allow the basement to double as a hangout space.
Final Thoughts
After designing and tweaking countless movie rooms, here’s my advice for you: prioritize comfort, sightlines, and acoustics above all else. Measure your space carefully, plan seating distances, and choose chairs that balance function with style. Small adjustments, such as raising a row, shifting a couch, or adjusting lighting, often have the biggest impact. Keep future upgrades in mind and select flexible options that can grow with your space. Following these basement home theater seating ideas will save you headaches and ensure long-term comfort and a truly cinematic experience.