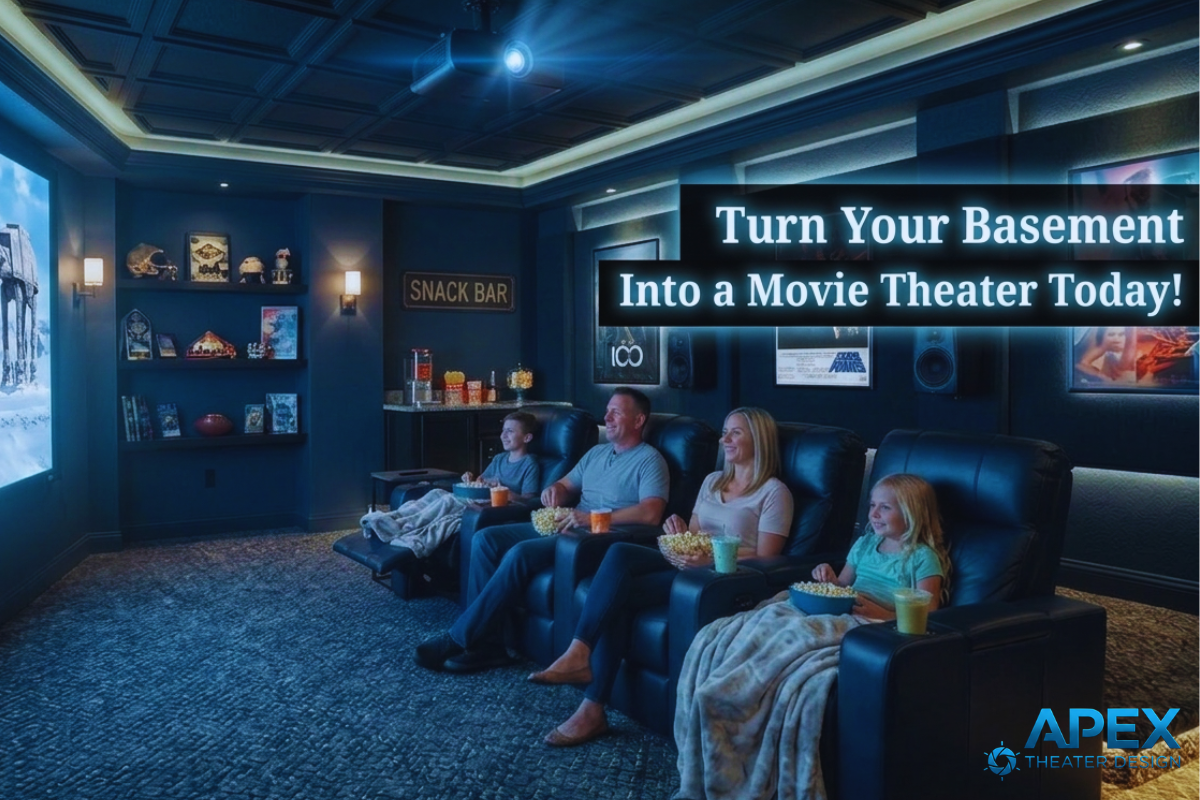
Imagine walking downstairs, dimming the lights, and settling into a comfortable recliner while a massive screen lights up in front of you. The opening soundtrack of your favorite movie fills the room with deep, immersive sound. For the next two hours, you are not just watching a movie. You are inside it.
That experience is exactly why so many homeowners dream of building a dedicated home theater. And if you have a basement, you already have the best possible starting point.
But…how to turn your basement into a movie theater?
Basements are naturally suited for cinema rooms. They are darker, quieter, and separated from the main living space. Those three factors alone make it much easier to create a theater-quality environment compared to a living room setup.
However, after designing and installing home theaters for more than 15 years, I can tell you that many basement conversions go wrong.
Homeowners often spend thousands on equipment but ignore the basics of room layout, acoustics, and lighting. The result is a theater that looks impressive but performs poorly.
In this guide, I will walk you through the entire process of converting a basement into a high-performance movie theater. You will learn how to:
- Evaluate your basement space before building
- Design a layout that maximizes screen size and sound quality
- Choose the right projector, screen, and audio system
- Control acoustics for clear, immersive sound
- Design lighting that enhances the cinematic atmosphere
- Select seating and plan your layout
- Build a theater that fits your budget
By the end of this guide, you will understand how to build a basement home theater that looks professional, sounds incredible, and avoids the common mistakes I see all the time in DIY installations.
Table of Contents
Why Basements Make the Best Home Theater Rooms

When clients ask me where they should build a home theater, my answer is almost always the same: the basement. There are several practical reasons why basements outperform other rooms when it comes to home cinema design:
Natural Light Control
Projectors perform best in darker environments. Even the most expensive home theater projectors struggle when ambient light hits the screen. But basements usually have the most suitable environment for using projectors, characterized by:
- Few windows
- Small window wells
- Limited sunlight
This naturally dark environment dramatically improves image contrast and black levels. The darker the room, the more cinematic your projector will look. Professional theaters are built to eliminate stray light for a reason. Basements already give you a head start!
Better Sound Isolation
Sound isolation is one of the most overlooked aspects of home theater design. Basements help with sound isolation in two ways:
- Underground concrete walls block sound
- Distance from bedrooms and living areas reduces disturbance
This means you can enjoy louder movie playback without worrying about disturbing the rest of the house. In professionally designed theaters, isolation is often expensive to implement, so getting a portion of it naturally in a basement home theater is truly golden!
Flexible Layout Options
Many basements are large open spaces without major design constraints. That’s a good thing because it allows you to create dedicated screen walls, multiple seating rows, acoustic treatment zones, and even equipment racks. Unlike living rooms, you do not have to design your movie room around furniture, windows, or everyday traffic.
Increased Home Value
Does a home theater add value to a house? I lost count of how many times I’ve heard this question. The truth is: Yes, a well-designed home theater can increase a home’s appeal and perceived value. Buyers often see a finished theater room as:
- A luxury upgrade
- A family entertainment space
- A unique feature compared to other listings
While I wouldn’t advise you to build a theater purely for resale value, it can definitely make your home stand out.
In the next section, we’ll walk through all the essential steps for transforming your basement into a fully functional home theater, from evaluating your space to planning layout, choosing equipment, and creating the ultimate cinematic experience.
Step 1: Evaluate Your Basement Space Before You Start
Before buying any equipment, you’ll need to understand the limitations of your space. This is the part that experienced installers spend the most time on.
WHY? Because they understand that good planning can go along way in preventing expensive redesigns later.
Measure the Room Dimensions
To properly evaluate your basement space for a movie room design, you should start by measuring the room width, length, and ceiling height. These three numbers will help you determine everything from screen size to speaker placement.
The ideal basement theater dimensions to look for are as follows:
- Ceiling Height: 8 to 10 feet
- Width: At least 12 feet
- Length: 16 to 24 feet
If your basement offers such dimensions, then you’re in luck because it allows sufficient space for proper seating distance and surround sound placement.
Decide The Viewing Distance
Once you have the room dimensions, the next thing you need to look at is the viewing distance. Here’s a simple rule I use when planning theaters:
Viewing distance = 1.2 to 1.5 times the screen diagonal.
For example, if you have a 120-inch screen, the ideal seating distance should be 12 to 15 feet.
Observing the ideal viewing distance helps keep the image immersive without feeling overwhelmed.
Check Ceiling Height and Obstructions
It’s also important to check your basement ceiling height for any obstructions present. Most of the basements we’ve worked with often have obstacles such as HVAC ducts, support beams, and plumbing lines.
These might not appear problematic at first glance, but they usually end up affecting:
- Projector placement
- Speaker height
- Riser design for second rows
Low ceilings can still work, but they require careful design. I have installed theaters in rooms with ceilings under 7 feet, but such cases always call for careful layout planning.
Inspect Moisture and Ventilation
Basements are naturally susceptible to moisture due to their underground location, which can lead to water seepage, condensation, or high humidity.
BEFORE installing expensive AV equipment, I’d advise you to inspect visible water leaks, damp or discolored walls, musty odors, and insufficient airflow that can trap moisture.
Persistent humidity can damage your electronics, warp speaker cones, and promote mold growth. So, if your basement is prone to these elements, you would want to take preventive measures such as:
- Installing a quality dehumidifier
- Sealing foundation cracks
- Ensuring proper ventilation.
Addressing these issues upfront protects your investment and ensures your home theater performs reliably for years, while maintaining a safe and comfortable environment.
Expert Tip: Skipping moisture control is one of the fastest ways to ruin expensive equipment. Projectors, AV receivers, and amplifiers contain sensitive electronics. High humidity can shorten their lifespan dramatically. If your basement has humidity problems, fix that BEFORE installing anything.
Electrical Capacity and Power Requirements
Home theaters often demand far more power than standard rooms. If you do insufficient electrical planning, you’ll have to deal with overloads, tripped breakers, or degraded performance.
Typical equipment for movie rooms, such as a projector, AV receiver, amplifiers, subwoofers, streaming devices, and theater lighting, can easily draw significant current, especially during peak usage.
As a professional Installer, I recommend that you install the following:
- At least one dedicated 20-amp circuit
- Position multiple outlets along the front wall for speakers and AV gear
- Add a ceiling outlet for a projector.
PRO TIP: Run conduit for HDMI and power cables during installation to future-proof the space. This allows you to easily make upgrades or equipment changes without any major rewiring.
Step 2: Plan Your Home Theater Layout

Layout determines how immersive your theater will feel. I always design theaters from the screen backward. This is how I would advise you to go about the layout planning part:
Choose the Screen Wall
Pick the wall that allows the largest possible screen. Stay away from a wall with doors, windows, and other major obstructions. Ideally, the screen wall should be the narrower side of the room. This gives you more depth for seating rows.
Determine Viewing Distance
Once you have chosen the ideal screen wall, you can then go ahead and calculate the seating distance. Some common screen sizes for basement theaters include 100-inch, 120-inch,and150-inch.
Let’s say, for example, you go with a 120-inch screen. In this case, your seating distance should be 12 to 14 feet. This creates a highly immersive viewing experience.
Decide on Single Row vs Multi Row Seating
If you have a small basement, then you should go with a single row seating. This is advantageous in giving you a simpler layout, better sound positioning, and lower cost.
Larger basements can support multiple rows. In these cases, we build a raised platform called a riser for the back row. And the typical riser height is usually 10 to 14 inches.
Leave Space for Equipment and Walkways
Avoid crowding the room; a spacious layout can make your theater feel inviting and professional. Be sure to leave space for comfort and safety. Ensure at least 3-foot walkways, room for equipment racks, and speaker clearance.
Step 3: Choose the Right Screen or Projector Setup

The screen and projector define the visual experience of your theater.
Projector vs Large TV for Basement Theaters
Large TVs have improved dramatically, but projectors still dominate dedicated theaters. So, which one should you choose for your home theater?
A projector gives you the following advantages:
- Much larger screen sizes
- True cinema experience
- Better immersion
And a large TV has these advantages:
- Brighter image
- Easier installation
- No projector maintenance
If your goal is to enjoy a true theater experience, a projector is almost always the better choice. If you want help selecting the right model, consider reading our projector buying guide or our guide to the best home theater screens.
Recommended Screen Sizes for Basement Theaters:
Most of our basement movie room installations fall into these size ranges:
- 100 inch: This is great for smaller basements
- 120 inch: This is the most common home theater size
- 150 inch: Ideal for large basements
The bigger the screen, the greater the immersive experience. One of the biggest mistakes you can make is choosing a screen that is too small!
My Advice: Go big or go home! A tiny screen kills the thrill while bigger screens pull you right into the action and make every scene feel epic.
Fixed Frame vs Motorized Screens
When choosing a screen for your basement movie room, you’ll also need to decide between a fixed frame and a motorized option.
Here’s a quick breakdown of how the two types of screens:
Fixed frame screens:
• Delivers the best image quality
• Tensioned surface for a flawless picture
• Common choice in dedicated theaters
Motorized screens:
• Retract when not in use
• Ideal for multi-purpose rooms
Pro Tip: For basement theaters, fixed frame screens are usually the best choice. They stay perfectly flat, deliver the sharpest image, and are always ready to use; ideal when your space is dedicated to movie-watching, and you want the most immersive experience possible.
Projector Placement and Throw Distance
Every projector has a “throw distance,” which is essentially the space it needs from the screen to fill the image correctly. How you install it makes a big difference.
The two most common installation methods include:
- Ceiling mount: Keeps the projector out of the way and gives a clean look.
- Centered with the screen: Ensures the image is perfectly aligned.
Many projectors have a lens shift feature that lets you fine-tune the image without tilting or distorting it.
Pro Tip: Plan your cable runs carefully. HDMI cables should go through the ceiling or a conduit to keep everything tidy and prevent tripping hazards.
Step 4: Design the Surround Sound System

Audio is where many theaters truly come alive. In fact, great sound often has more impact than picture quality.
Why Audio Matters More Than Video:
Studies have established that your brain uses sound cues to determine space and realism (Source). A properly designed surround system can deliver:
- Directional movement: You hear objects moving around the room.
- Environmental immersion: You feel like you’re inside the scene.
- Emotional intensity: Music and effects hit harder.
Without good audio, even the biggest screen can feel flat!
Popular Surround Sound Layouts include:
- 5.1 system: This setup has three front speakers, two surround speakers, and a single subwoofer. It’s a great choice for small to medium rooms and delivers clear, immersive sound without being overcomplicated.
- 7.1 system: This adds two rear surround speakers to the 5.1 setup, giving you a wider sound field. It’s ideal if you have a larger room and want more depth and movement in your audio.
- Dolby Atmos: Dolby Atmos takes things to the next level by adding overhead speakers for sound that moves above you. Common setups like 5.1.2, 5.1.4, or 7.1.4 create a fully immersive experience, making you feel like you’re right in the middle of the action.
Speaker Placement Best Practices
Correct speaker placement is essential for creating an immersive, lifelike audio experience.
When each speaker is in the right spot, sounds move naturally around the room, dialogue stays clear, and every explosion, whisper, or musical note hits exactly where it’s supposed to.
Follow these quick tips to achieve the best speaker placement in your movie room:
- Front Speakers: Place your front left and right speakers at about ear level and angle them slightly toward the seating area. This ensures a clear, balanced sound and makes dialogue and effects feel natural.
- Center Channel: This speaker handles most of the dialogue, so put it directly under or just behind the screen. Keeping it centered keeps voices crisp and anchored to the action on screen.
- Surround Speakers: Mount these just a little above ear level—about 1–2 feet higher—and slightly behind your seating row. Avoid putting them near the ceiling; if they’re too high, the immersive effect gets lost.
- Subwoofer: Subwoofers produce deep bass, which your brain feels as much as it hears. They often work best near the front wall or tucked in a corner. For larger rooms or smoother bass, consider adding a second subwoofer.
Expert Tip: The most common mistake we repeatedly see homeowners make is placing their surround speakers too high. Stick to the recommended height, and your movies will feel far more enveloping and realistic.
If you want deeper guidance, see our speaker placement guide or our AV receiver buying guide.
Choosing An AV Receiver
Your receiver powers all the speakers and decodes formats like Dolby Atmos. When choosing one, make sure it has enough channels for your setup, supports HDMI 2.1, and includes room calibration software. Calibration tools automatically adjust speaker levels and timing so your sound fits your room perfectly.
Step 5: Control Acoustics for Better Sound
Even the best speakers and subwoofers won’t sound right if your room isn’t set up properly. Acoustics make a bigger difference than most people realize… they’re what turns a good system into a truly immersive theater.
While basements are great for home theaters, they also have challenges. The concrete walls, hard floors, and bare surfaces reflect sound. This usually results in muddy dialogue and harsh sound.
So, how do you solve this problem? You do soundproofing and acoustic panels installation.
Acoustic Panels vs Soundproofing:
The two terms are often confused. Acoustic panels help improve sound quality inside the room. Soundproofing prevents sound from escaping the room.
For most home theaters, you should start with acoustic treatment first. Soundproofing only matters if you’re worried about bothering your neighbors.
Where to Put Acoustic Panels:
As professional home theater builders, we often focus on these three areas:
#1. First reflection points: These are the spots on your side walls where sound bounces toward your listening spot first. Adding panels here makes dialogue and effects much clearer.
#2. Rear wall: Panels on the back wall help reduce echoes so your sound doesn’t feel washed out.
#3. Corners/Bass traps: Low bass tends to gather in corners. Bass traps soak up this energy, tightening your bass and making it punchy without booming.
Carpet and Soft Furnishings
Installing the right carpet on your home theater floor helps stop floor reflections and makes the room cozy (Read more on our guide on the best basement home theater flooring). Additional soft furnishings to include in your basement home theater to help smooth out the sound further include curtains, fabric wall panels, and upholstered seats.
Professional Insight: When tuning a theater, we often sit in the main listening spot and play pink noise while adjusting panels. This shows how small tweaks can completely change how the room sounds. DON’T underestimate the power of moving a panel a few inches.
Step 6: Lighting Design for A Cinematic Experience

Lighting can make or break your home theater atmosphere. The right setup creates atmosphere, guides people safely, and makes your movie nights feel like the real deal.
Here are expert tips to help you achieve the best lighting for your basement movie theater:
Use a Layered Lighting
Good theater lighting uses a mix of layers as outlined below:
- Ambient lighting, which provides soft overhead light so you can move around safely.
- Task lighting for highlighting seating or walkways for convenience.
- Accent lighting to add decorative touches, like wall sconces or LED strips, to create atmosphere without distracting from the screen.
LED Strip Lighting for Theater Atmosphere
LED strips are extremely popular in theaters and are commonly placed in the following areas:
- Under seating
- Along risers
- Behind wall panels
- Ceiling tray edges
They help provide a soft glow without interfering with the screen.
Smart Lighting and Automation
With smart lighting systems, you can easily preset scenes like movie mode for dimmed lights, intermission mode for brighter light during breaks, or cleaning mode to fully illuminate the room. You just press one button, and the entire room magically adjusts!
Avoiding Light Spill on the Screen
Even small amounts of light hitting your screen can wash out your picture and reduce contrast. For this reason, I recommend using indirect lighting, wall sconces, or low-brightness sources to keep the screen dark while still illuminating the room.
Step 7: Choose Comfortable Home Theater Seating

The longer people stay comfortable, the better the movie experience. This makes basement home theater seating considerations a crucial part of how to turn your basement into a movie theater.
Choose Between Theater Recliners vs Sofas
Theater recliners are, no doubt, the most common choice for dedicated home theaters because they offer individual seats, built-in cup holders, and power recline for ultimate comfort.
Sofas are more casual, flexible, and often come at a lower cost, making them a good option for multi-purpose rooms.
Most dedicated theaters use recliners.
How Many Seats Can Your Basement Fit
When planning your layout, allow about 36 inches per seat and 20 inches for armrests. A room that is 12 feet wide typically fits four seats comfortably without feeling cramped.
Adding A Seating Riser for Multiple Rows
If you want a second row, you’ll need a riser (a raised platform), so everyone has a clear view. A good rule of thumb is to make the riser about 12 inches high (this works well in most basement theaters).
If planning multiple rows, see our home theater seating layout guide to ensure everyone has space and a good view.
Pro Tip: When choosing your theater seating, consider convenient features like USB charging ports, power recline, LED cup holders, and built-in storage compartments. These small additions can make long movie sessions much more comfortable and enjoyable.
Step 8: Budget Planning for A Basement Movie Theater

How much your theater costs really depends on what you want. Here’s a quick breakdown of the budgets we usually see and what you can expect at each level:
Entry Level Basement Theater ($3,000 to $7,000)
On a budget of $3,000 to $7,000, you can get a 100-inch screen, an entry-level projector, a 5.1 sound system, and basic seating.
Mid-Range Home Cinema ($8,000 to $20,000)
If you step up your budget to $8,000–$20,000, you could have a 4K projector, a 120-inch screen, Dolby Atmos audio, acoustic panels, and comfy theater recliners. Theater recliners
High End Custom Theater ($25,000+)
If you’re going all out, $25,000+ can get you a premium projector, a huge acoustically transparent screen, top-notch audio, full acoustic treatment, smart lighting, and luxury seating.
Where to Spend the Most Money
When budgeting for your home movie room, I strongly advise you to focus on the parts that have the biggest impact on your theater experience.
Consider:
- high-quality speakers
- A powerful subwoofer
- A sharp projector
- Proper acoustic treatment
These will make your movies sound and look amazing. Other items, like décor or lighting, can come later without hurting performance.
Money-Saving Tip: You don’t have to spend a fortune to enjoy a great home theater. Ways you can save money include using DIY acoustic panels, choosing more affordable seating, or upgrading equipment gradually over time. Starting small and improving your setup later can save a lot while still giving you an awesome movie experience.
Common Mistakes People Make When Building A Basement Theater

After years of helping people set up home theaters, we’ve seen the same mistakes happen again and again. Let’s quickly walk through these mistakes below to help you avoid them and get the most out of your basement home theater setup.
- Choosing A Too Small Screen: Homeowners often underestimate how big a screen should be. I once replaced a 90-inch screen with a 135-inch screen in a basement theater. The client said it completely transformed the experience.
- Ignoring Room Acoustics: Bare walls create terrible sound. Even expensive speakers will sound poor without acoustic treatment.
- Poor Speaker Placement: Speakers pushed into corners or mounted near ceilings rarely perform well. Correct positioning is essential.
- Installing Lighting That Washes Out the Screen: Placing downlights directly above the screen causes glare. This destroys projector contrast.
- Forgetting Ventilation for Equipment: AV receivers and amplifiers generate heat. Equipment racks must have airflow to prevent overheating.
Advanced Tips To Take Your Basement Theater To The Next Level

Once you’re done with the basics, you can consider the following upgrades to dramatically elevate the experience:
Add Smart Home Automation
Automation systems let you control lights, the projector, the audio system, and streaming devices all at once. One command can set the perfect movie mode, making your theater feel high-tech and effortless.
Install a Dedicated Equipment Rack
A proper equipment rack keeps cables organized, improves cooling, and makes maintenance easier. Some people even place racks in nearby closets to keep the theater area neat and uncluttered.
Use Black Paint or Acoustic Fabric Walls
Dark walls, like black or dark gray, absorb stray light instead of reflecting it. This improves image contrast and makes your movies look sharper and more cinematic.
Consider Star Ceiling Lighting
Fiber optic star ceilings mimic a night sky and add a dramatic, immersive touch to your theater. It’s a small detail that makes your entertainment space feel truly special.
Add Sound Isolation for Loud Movie Nights
If you like to watch movies at full volume, adding sound isolation can prevent disturbing the rest of the house. You can keep the sound contained by using techniques like double drywall, acoustic insulation, and isolation clips.
Basement Home Theater Setup FAQs:
Before we wrap things up, let’s go over some of the most common questions homeowners ask about setting up a basement home theater.
How much does it cost to turn a basement into a movie theater?
Costs for turning a basement into a movie theater typically range from about $3,000 for a basic setup to over $25,000 for a high-end custom theater. The final price depends on equipment quality, seating, acoustic treatment, and room construction.
What is the best screen size for a basement home theater?
Most basement theaters use screens between 100 and 150 inches. A 120-inch screen is the most common choice because it balances immersion with comfortable viewing distance. Bigger is always better when it comes to home theater screens.
Can I build a basement home theater with a low ceiling?
Yes. Even ceilings under 8 feet can work with careful design. Low-profile projectors, in-wall speakers, and single row seating layouts help maximize space.
Do basement home theaters need soundproofing?
Not always. Basements already reduce noise due to underground walls. Most theaters benefit more from acoustic treatment than full soundproofing.
Is a projector better than a TV for a basement theater?
For a true cinematic experience, projectors are usually better because they allow much larger screen sizes. TVs can work well in smaller media rooms but rarely match the immersion of a projector setup.
How dark should a basement theater room be?
The darker the better. Ideally, the room should have minimal ambient light when watching movies. Dark wall colors and controlled lighting dramatically improve projector image quality.
What is the best surround sound setup for a small basement?
A 5.1 or 5.1.2 Dolby Atmos system works very well in smaller basements. These systems provide immersive audio without requiring large amounts of space. Check out these 22 brilliant small basement home theater ideas.
Conclusion
Hopefully, you now have an idea of how to turn your basement into a movie theater. The key is planning and attention to detail. Start by evaluating your space, designing the layout around the screen and seating, and investing in a quality projector and surround sound system. Control acoustics, fine-tune speaker placement, and layer your lighting for the perfect atmosphere.
Avoid common mistakes with screen size, acoustics, and placement. Follow these principles, and you’ll create a basement theater with stunning visuals, immersive sound, and unforgettable movie nights.